Showing posts with label recipe. Show all posts

24 May 2016

Fresh Ginger Snaps


I've been making these ginger snap cookies with fresh ginger for as long as I can remember. I'm not even sure where the recipe came from originally, but for sure my mom was making them before me. Using fresh grated ginger, instead of dried/ground, and then molasses makes people rave about these cookies. In fact, I made them for a gathering of friends last month and saw some those same friends last night and someone asked about them. I thought for sure I had already blogged this recipe and although I found a couple mentions, I couldn't find the actual recipe. Since I want to share the cookie love, I'm sharing the recipe now so you can try them in your own kitchen and share them with your friends and family.

Some friends have called them "ginger softs" since they tend to turn out with a crispy/sugary outside and a soft middle. That's the best way a cookie can turn out, if you ask me.

Fresh Ginger Snaps

1 cup sugar
3/4 cup vegetable shortening or butter (I use butter most often.)
4 Tbsp  Molasses
1 egg
1Tbsp fresh grated ginger
2 Cups flour
2 tsp baking soda
1 tsp cinnamon
1/2 tsp salt
1 tsp ground cloves
1 tsp ground nutmeg

  1. Preheat oven to 350°.
  2. Mix together sugar and butter using a stand or hand mixer, mix until creamy.
  3. Add Molasses, egg and fresh grated ginger, mix until combined.
  4. Sift together the dry ingredients and slowly add them to the mixer, mixing until fully combined and you have something that resembles cookie dough. 
  5. Using about a Tablespoon of dough for each cookie, roll the dough into a ball and then coat each ball of dough in sugar and set on your baking sheet. (I usually put about a little less than a half cup of sugar in a small bowl and then drop the dough ball in the sugar bowl and roll it around to get the sugar coating.) Bake for 10-12 minutes. Makes about two and half dozen.

28 October 2013

Pumpkin Lentil Soup

So I mentioned in my last post that I need to up my food game. So in an attempt to do just that, I tried a new recipe that I'd like to share with you! Since the seasonal debut of Starbuck's Pumpkin Spice Latte, it seems like there's pumpkin or pumpkin spice flavored everything, right? Since seeing this recipe in the September issue of Better Homes and Gardens, I've wanted to try it. I doubled the original recipe and made it vegetarian, but if you want to see the original, you can go here. (You have to log into their site to view, FYI.)


Pumpkin Lentil Soup

1 medium or half a medium sweet onion, cut into wedges
2 yellow sweet peppers, seeded and sliced into strips
1 cup lentils, rinsed and well drained
2 Tbsp. olive oil
1 Tbsp. grated fresh ginger (this is a rough estimate, as I used a heap)
2 tsp. curry powder
2 tsp. ground cumin
salt (the original recipe only called for salt and pepper as seasoning at the end, and I found it in desperate need of salt, so adding as it cooks is something I'd do next time)
48 oz. vegetable stock (I used a 32 oz box and a regular size can)
1 30 oz. can pumpkin puree

In a stock pot, cook onion, sweet pepper and lentils in oil over medium to high heat for 5 minutes, until onions just start to soften. Stir in ginger, curry powder, cumin, stock and pumpkin puree. Bring to a boil, then reduce heat to low. Simmer, covered, for at least 20-30 minutes or until lentils are tender. Season to taste with salt and pepper before serving. Garnish with a sprinkle of nutmeg. Serves 8.

I ended up using a smaller can of vegetable stock in place of the second container of stock pictured. If you are serving a crowd, it would probably be fine to use two boxes. Your soup will just have a bit thinner consistency. 

Getting everything ready. 

Sauteing the onion, pepper and lentils. Make sure you rinse and drain the lentils before adding them to the pan with the onions and peppers. 


23 June 2013

New Summer Slaw

So I've written before about my tendency to become obsessed with a good cole slaw recipe. I think I've found a new one! I peruse Pinterest on the regular for tasty tidbits to try out in my kitchen. I recently pinned this particular recipe (Asian cucumber/Napa cabbage slaw with peanut cilantro dressing). It caught my eye because it looked super simple to make and like it would be refreshing on a warm summer evening. I was right!


I ended up changing it up a bit so feel free to try my recipe or the original linked above.

1 1/2 bags of ready to use shredded slaw mix (cabbage & carrots)
4 small cucumbers (mine were about the size of fat cigars), julienne cut (if you are lucky enough to have a mandolin slicer with a julienne blade, use it!) I just used my sharpest knife to cut match stick size pieces. Leave the skin on.
1/2 cup chopped, roasted, salted peanuts
1/4 cup chopped fresh cilantro
1/3 cup vegetable or olive oil
Juice of one lime
2 tsp sugar
3/4 tsp salt
1/2 tsp garlic powder
1 garlic clove, pressed or chopped
splash of rice vinegar
generous amount of cracked black pepper

Assemble slaw mix, cucumbers, cilantro in a large bowl. In a small bowl whisk together oil, lime juice, sugar, salt, garlic powder, garlic, rice vinegar and cracked pepper. Pour dressing over veggies and mix well. When ready to serve, sprinkle peanuts over slaw to garnish. Enjoy!

24 February 2012

What's for Dinner?


So I've had some asparagus in my fridge since doing groceries last weekend. I was feeling all inspired about making dinners this week. Friday rolls around and the asparagus is all, "hey, remember us?" Yeah, I do remember you and tonight's the night.

Here's what I did. I roasted about half bunch in the oven.  Rinse and pat dry. Snap the bottoms off. Sprinkle with a little olive oil. Salt and pepper liberally and pop it in the oven at 450-500 for 10 minutes. Fry up your egg and place it on your roasted asparagus, et voila a delicious simple dinner. Aactually it's an all around tasty, quick meal for any time you need one!

I usually fry up my eggs so they're over hard, but some folks dig the yolk with asparagus. It's like a thing, I guess. So I decided to go sunny side up and was glad I did. It was super tasty. Count me as one of those people who digs the yolk with asparagus now.

What did you have for dinner?

05 December 2011

OMG Cookies!


I made these cookies yesterday! I found the recipe on Bakerella. She calls them Dark Chocolate Chip Comfort Cookies and I would have to agree on the comfort part. I haven't had or baked a cookie like this...ever and I've baked a cookie or twelve in my time! Chocolate peanut butter dough with dark chocolate chips...ridiculously delicious and they have a perfect texture. They were fantastic to bring to work as a treat to celebrate my five-year work anniversary! They now have a place in my regular cookie baking repertoire and may just be my new favorite.

What's your favorite cookie to bake and/or eat?

27 November 2011

What's for Dinner.


Huevos Rancheros. Turns out the meal with such a fun name to say is equally fun and easy to make. Are you sick of your Thanksgiving leftovers yet? This might be a great recipe to try! I've had this kicking around in my head for a bit, since the main ingredients are always staples in my kitchen. Tonight was the first time I've actually made it and I must say it was muy bueno!

Here's what I used to pull it together:

1 corn tortilla, warmed 
1 slice soy cheese (smoked provolone flavor)
black beans seasoned to taste with cumin, chili pepper and a splash of salsa
1 fried egg seasoned with salt, pepper and onion flakes
half a roma tomato, diced
salsa
guacamole, which had the other half of the roma tomato

Pile it all together and enjoy! The fun is that you can really play around with the ingredients and add/subtract depending on what you have on hand. This combination above was super tasty and is likely to become a standard quick meal at Casa Starr Fish. 


23 November 2011

Ye Olde Pumpkin Pie

Oh, pumpkin pie, I so enjoy your fragrant deliciousness. I haven't had the honor of making the Thanksgiving pumpkin pies in a few years. There was that one year a few back when we had Thanksgiving here and I believe I made the pies. I think that may have even been vegan pumpkin pie that year. This year, I volunteered to bake and thought I'd share the process with you!

Something you should know about me first, I'm a "make the crust from scratch" kinda gal. What can I say, I'm my mother's daughter. She taught me well. 

Pie Crust
2 cups flour
1 tsp. salt
2/3 cups vegetable shortening
6-9 Tbsp. VERY cold water (I usually add a couple ice cubes to a bowl of water while I'm cutting the shortening into the dough and then use that.)


Measure your flour, salt and shortening into a bowl. Using a pastry cutter, mix everything together until it is crumbly. It should look like small pebbles, #1 (click the photo to get a closer look). Then add the water, three to four tablespoons at first, then mix. Then add at least two more tablespoons of water and continue to mix. the dough should begin to bind together as you're mixing/stirring. Depending on how well it's coming together (or not) you may or may not need to add the remaining water. Once it starts getting close to a ball of dough, dig right in with clean hands and bring it all together. You should end up with a ball of dough like #2. Cut the ball of dough in half and wrap each piece of dough in plastic wrap and put in the fridge for at least a half hour. 

When the dough has had enough time to chill in the fridge, put one round of dough on a floured surface and roll it out (#3) until it's just a bit larger than a 9" pie pan. Carefully fold the dough circle in half, (but not pressing it together) then in half again to transfer it to your pie pan. Unfold the dough and form it into the pan. It can be a tricky process, but do like Tim Gunn says and just make it work. The finished shell should look like #4. Repeat with the other lump of dough. Yields two pie shells.

If you're not feeling up to the dough challenge, you can totally cheat and buy ready made pie crust, but then you won't have the satisfaction of making your own. Just try it! 

On to the pie. I used the recipe right of the can of Libby's 100% pumpkin. Apparently that's the one my mom's been using all these years!

Famous Pumpkin Pie
1 1/2 cups sugar
1 tsp. salt
2 tsp ground cinnamon
1 tsp. ground ginger
1/2 tsp ground cloves
4 large eggs
1 can (29 oz.) 100% pure pumpkin
2 cans Evaporated milk
2 unbaked 9-inch (4-cup volume) deep-dish pie shells (see above)

Mix sugar, salt, cinnamon, ginger and cloves in a small bowl. Beat eggs in large bowl. Stir in pumpkin and sugar-spice mixture. Gradually stir in evaporated milk.

Pour into unbaked pie shells.

Bake in a preheated 425 degree oven for 15 minutes. Reduce temperature to 350; bake 40-50 minutes or until knife inserted near center comes out clean. My pies baked for close to an hour so you have to keep an eye on them and let them do their thing. Cool on a wire rack for 2 hours, then serve or refrigerate. 

The sugar-spice mixture.

The eggs, sugar-spice mixture and pumpkin prior to mixing. I used my mixer, but you can do the mixing by hand.

Ta-da!! It's pumpkin pie, fresh out of the oven. I cannot wait until tomorrow to eat it up!


06 November 2011

Oatmeal Bread


This recipe has been a favorite of mine for years. It's my mom's recipe and I've literally been making it since probably middle or high school. Long time, folks! In my book a recipe works when the actual prep is super simple and the end result is tasty and you find yourself going back to it time and time again.

This bread is delish for a weekend brunch or with soup for a quick dinner. Try it and see how you like it.

Oatmeal Bread

3 cups flour (I've used plain white flour or a combination of white and whole wheat)
5 tsp. baking powder
1 Tbsp. salt
1 1/2 cups quick oats, uncooked (If you use old fashioned oats, give them a spin in the food processor to break them down a bit.)
1 1/4 cups milk (regular or soy)
1/4 cup honey
1/4 cup vegetable oil
1 lg egg

Heat the oven to 350. Grease and flour a 9"x5"x3" bread pan.

Combine the dry ingredients in a large bowl. You can use a sifter to mix everything together or just use a whisk to stir all the dry ingredients together.

Combine the milk, honey, oil and egg in a smaller bowl. Whisk to combine. Then stir the dry into the dry ingredients. Mix together well until all the dry bits are incorporated and you've got something that resembles bread dough. Spread dough into the pan. Bake 55-60 minutes until golden brown. Remove from pan and cool on a wire rack before serving.

Dry ingredients, minus the oats. I used half all purpose flour and half whole wheat flour.

Wet ingredients.

Wet and dry ingredients mixed together = dough.

Fresh out of the oven! Chilling on a wire rack.


02 November 2011

Vegetarian French Onion Soup

I have a thing for melty blankets of cheese. And bread. I'm so into the cheese that most of the time, I have a rule that I don't purchase cheese unless it's for a specific recipe. And my bread rule includes only purchasing Ezekiel Sprouted Grain bread for regular consumption. You know, because it's good for me in that whole grain, complete protein, granola-crunchy way and not super processed. These days I'm hooked on making peanut butter toast. A while back it was avocado toast. End Ezekiel toast tangent.

Well my friends, rules are made to be broken! This soup has both cheese and non-Ezekiel bread and yeah, there's some actual liquid called onion soup in the bowl too! It's one of the most simple soups I make and one of the most deliciously cozy for a cold fall or winter meal. Make it the next time you're craving warmth in a bowl.


Sweating to the oldies, I mean onions...


Almost done...


Warm, toasty and melty...ready for dinner. Get in my belly!

Vegetarian French Onion Soup

1/4 to 1/2 stick of butter (use less if you use 1 large onion, more if you use more onions)
1 to 2 large sweet onions, sliced into rings
1 carton vegetarian broth
1 can vegetarian broth (however you can get to about 6 cups broth)
1 bay leaf
about a 1/2 tsp thyme
cooking sherry
crusty french bread sliced on the diagonal into rounds then lightly toasted
melty white cheese of your choice, shredded (Lots of recipes use Gruyere. I used a combination of provolone and muenster this time.)
salt and pepper to taste

1. In a large stock pot, melt the butter over low to medium heat. Add onion rings, sprinkle with a bit of salt. Cook over medium heat for 5 minutes stirring gently. Reduce heat to very low and cook for 45-50ish minutes until the onions are tender and browned.
2. Once onions are tender and browned, turn heat back to medium and add two to three large serving spoons of cooking sherry, sprinkle in thyme. Cook and stir gently for about two minutes.
3. Add broth. Simmer for at least 30 minutes.
4. Cut your bread into rounds. Toast or broil them so they are crisp.
5. Shred chosen cheese.
5. If you used the broiler for your toast rounds, then you're one step ahead of the game. With the broiler on, assemble your oven-proof soup bowls. I butter the edge of the bowl lightly to help make cleaning up melty cheese bits less of a chore. Ladle soup into bowl, arrange bread rounds to cover the bowl's surface area (honestly this is a personal preference step. Use however many will fit into your bowls or how many (or few) you prefer. I used three because that's what filled up the bowl's surface area. Sprinkle with shredded cheese and place the entire bowl very carefully on the top rack of your oven under the broiler. Broil for 2-3 minutes, watching closely until the cheese is bubbly and slightly browned. Carefully remove from broiler, and prepare to enjoy. As servers often say in restaurants, "be careful, this dish is very hot!" Try not to burn your fingers touching the bowl once it's on the table and try not to burn your tongue as you dig into the soup!

28 August 2011

Peanut Butter Pie


If you're a foodie like me and follow any number of food blogs, you've probably seen some Peanut Butter Pie mentions of late. If you haven't, you should read this and watch this. Go on...I'll wait for you right here.

If you're a little teary-eyed after both of those, I'll give you a minute to collect yourself.

Jennie from In Jennie's Kitchen lost her husband Mikey and she couldn't help but think of that Peanut Butter Pie she didn't get a chance to make for him. As she blogged about her grief, she shared the recipe and closed her post with these words:

For those asking what they can do to help my healing process, make a peanut butter pie this Friday and share it with someone you love. Then hug them like there's no tomorrow because today is the only guarantee we can count on.

Food plays such a huge role in our lives, beyond providing nutrition and sustenance, it also acts as a means for us to relate to other people, the people we love, cherish and appreciate, and celebrate the times we have together. Making special recipes can also act as a conduit for connecting to and processing all sorts of feelings, including grief. It took me a few days to gather the ingredients for this Creamy Peanut Butter Pie, but I thought of Jennie and her daughters often until I had the chance to make it last week. When I was done in the kitchen that night, I read her blog post again and tried posting a comment. Comments were no longer being accepted, so I'm posting it here:

"I don't remember how I originally saw this tribute for your obviously beloved, departed husband Mikey. Just know that my heart goes out to you and your girls. I've thought of you and your peanut butter pie often since I saw your post for the first time. I finally had the time to make the pie tonight. I have tears in my eyes for you, your family and those whom I love, but cannot share this pie with. Sending you peace, love and light from my kitchen in Michigan tonight and from now on every time I make your creamy peanut butter pie (for Mikey)."


I made the pie and shared it with my best girlfriends from high school on Tuesday night last week. I then brought in the leftovers for my crew at work. There are so many more people I would have loved to share this pie with. If you have even the slightest yen to make this pie for those you love, do it. You won't regret it.

11 August 2011

Sweet Snack Secret

This is a story about something so simple, yet so delicious.

It's a little sweet snack secret that I'll share with you because I like you and I want you to be able to partake in this tasty goodness whenever you like. If you're anything at all like me, that will be on the regular.

It's been proven that I like to bake. It's also been proven that I can, at times, use a little help getting beyond my sweet-teeth (I don't just have one). There are times when I'm in dire need of a sweet and I have absolutely no business baking something that will result in a large pan or batch of anything sitting around my kitchen. This so simple, yet so delicious sweet snack was born out of one of those instances.

Behold...

Three simple ingredients: Two graham crackers. Peanut Butter. A handful of chocolate chips (melted). Prep: break each graham in half. Smear peanut butter on each square. Then top with melted chocolate.

What? You say, it's not a big deal. You make this all the time or your kid does and they make a mess. Well, my friend, that's where you are sadly mistaken, because if you look closely at the photo, you may be able to decipher the secret to this so simple, yet so delicious snack. Once assembled, you pop everything in the freezer and wait at least a half hour so everything is firm and the chocolate has a frozen snap to it. That time spent in the freezer turns this so called pre-school snack into something akin to snack salvation. I dare you to try it and not get at least a little hooked and make them a couple days in a row. Go on...you know you want to!

15 February 2011

Veg Pad Thai with a Twist!

Among other topics, my google reader is full of food and fitness blogs. Some cross over covering both topics and some NEVER do (the baking sites!). I don't remember when I added Kristin D.'s Aqufit blog, but it was originally for the fitness info. Lately she's blogged about food that falls into the Paleo diet (basically lean meats/seafood, fruits, veggies and nuts). While I'm not Paleo, I am a longtime vegetarian trying to eat more veggies and fewer processed and starchy foods. When I saw her recipe for Paleo Pad Thai, I had to try it! Here's my vegetarian version:

Pad Thai with a Twist
Makes four generous portions with leftovers as a distinct possibility.

2 spaghetti squash (there's the twist, right off the bat, no noodles!)
1 container extra firm tofu

Marinade
3 Tbsp. soy sauce
1 tsp. corn starch

Pad Thai Sauce
3/4 Tbsp. Tamarind Paste (dissolved in 1/4 cup warm/hot tap water)
1/2 tsp. crushed red pepper (more if you want more heat! or 1-3 tsp. chili sauce which I didn't have)
3 Tbsp. brown sugar
(If you're not veg and want that fish sauce taste, you'll want to check out the original recipe!)

Everything else
olive oil for stir frying
4 cloves garlic (pressed)
vegetable stock
1 package bean sprouts
chopped cilantro
ground or chopped peanuts
lime wedges

The first step in your journey to an amazing meal might be securing a stash of Tamarind Paste, if you don't already have it. If you're in Grand Rapids, Michigan, check out Lee's Asian Market on Division, just south of 28th Street. I asked the lovely lady working and she walked me right to it!

Tamarind Paste

Second step, baking the spaghetti squash. This can be done in advance of your actual stir frying. I baked mine in the morning and put it in the fridge until I was ready to put everything together. Spaghetti squash have a very tough skin, so before you cut into it, put the whole thing (one at a time!) in the microwave for 3-4 minutes. This will help soften the skin and make cutting it in half, lengthwise much easier. Once you cut each in half, scoop out all the seeds and guts. Sprinkle a little olive oil on each and season with pepper. Put them in a 350° oven on a baking sheet. Bake for 45-60 until the flesh is soft and can be scooped out. Scoop out each half and put your "spaghetti" aside until you're ready for it.

Hello, my name is Spaghetti Squash.

Baked. The half on the left, you can see I've already started scraping "spaghetti" out.

Drain the water your block of tofu came in. You're going to want to press the liquid out of it before you cut it up and marinade it. To press it: wrap the whole block in a couple sheets of paper towel and then wrap it in a clean kitchen towel. Place it between two plates and place something heavy on it - you can use magazines like I did. You'll want to check it after about a half hour and wrap it in new paper towels and/or a new kitchen towel. Check back after another half hour or so and it should about ready. If not, repeat the process. This is a trial and error system, even if it's not super dry, it's still going to work!

Catching up on some Dwell? Nah, pressing some tofu, yo! (It's hiding between the stainless plates!)

While the tofu is pressing, mix together the soy sauce and corn starch for the marinade. Set it aside.

Tofu marinade in the making.

Mix together the Tamarind Paste/water combo together with the rest of the ingredients for the Pad Thai sauce and set aside. It will be somewhat lumpy from the tamarind chunks, but no worries there.

When your tofu is pressed, cut it into chunks and pour the marinade over it. I put mine in a plastic container that I could shake up as it was marinating. Let it sit until you're ready to stir fry.

Pressed tofu, cubed and ready for the marinade.

Heat your wok (or other large fry pan - the bigger the better) over medium-high heat. Add enough oil to cover the bottom of the pan and your minced garlic. Stir for about 30 seconds.

Add the marinated tofu. Stir fry for 30 seconds to 1 minute. When the wok starts to get sticky, add 1-2 Tbsp of vegetable stock at a time to keep things stirring smoothly. Continue this process for 5-8 minutes.

Add the baked spaghetti squash. Eyeball how much your wok can hold. I probably had one half of a squash that I didn't use because it was getting too crowded in the wok! Pour the Pad Thai sauce over and stir fry for a few minutes until everything is heated through.

Add the bean sprouts and stir fry for about another minute.

Ready to wow your taste buds! Enjoy!

Gather the hungry masses and start plating it up, either individual plates or if you're serving a crowd, put it on a serving plate. Top with the chopped peanuts and lots of chopped cilantro (or as my family calls it, "green gold"). Serve with lime wedges and enjoy!! I had seconds and can attest, it makes a delicious lunch.


09 January 2011

Snacks

I made this way-easy curried tempeh spread yesterday. Never had tempeh? It's a fermented soy product that comes in handy for us vegetarians as a nice meat alternative. Higher in protein than regular tofu, and in my opinion depending on the need, more simple to cook with since it's naturally condensed in a way that tofu isn't.

Curried Tempeh Spead

1 8-10 oz package tempeh (I buy LiteLife brand. If you're local, it can be purchased at Meijer and is probably a staple at health food stores.)
1/3 cup soy mayo or regular mayo (Your choice, I used miracle whip because that's what I had.)
1 tsp yellow mustard (Prepared mustard, not dry.)
1 tsp curry powder
pinch chilli powder
1 scallion, minced (optional)

Grate or crumble the tempeh into a bowl. I used a box a cheese grater. In a separate bowl mix mayo, mustard, curry powder, chili powder and scallion if using. When mixed well, add to the grated tempeh and stir together. Serve with crackers as pictured, or use your imagination. I'm thinking it would be good in a sandwich. I do know that whenever I make it, it doesn't last long!

Curried Tempeh Spread (right) pictured with Roasted Red Pepper Hummus & Crackers

02 January 2011

Ooh Mashed Potato Pancakes

Mashed Potato Pancakes with Cranberry Orange Sauce

The mystery of what to do with leftover mashed potatoes is something I've never had to contemplate. On Thanksgiving or whenever the fam is all together and mashed potatoes are made, we usually ask, "will that be enough for dinner AND leftovers?" We don't like mashed potatoes in my family, we love them, even leftover. I made them last week. Let me tell you, mashed potato leftovers take a lot longer to get through when you have fewer bellies craving them! I had mashed potatoes that needed a new life. Enter the mashed potato pancake! I wondered what the difference was between mashed potato pancake and a traditional latke - turns out latkes are made with shredded potato!

Mashed Potato Pancakes

2 cups mashed potatoes
2 eggs
1/4 cup flour
chopped onion
salt & pepper

I started by putting the cold mashed potatoes in the microwave for a couple minutes to take the chill off just enough so I could actually stir them. Add two eggs, flour, chopped onion and salt and pepper. Mix everything together. It will still be kind of thick, you want it to hold together and not be runny. Add vegetable oil to coat the bottom of a large frying pan, heat over medium to high heat. When oil looks extra shiny, drop spoonfuls of your potato mixture into the pan.

First batch in the pan.

They dropped in clumps that I smoothed out with the back of a spoon. Cook until the bottom browns, then flip and cook the other side. Once you flip them, you can use your spatula to press them down a bit. Cook in batches until you have a yummy plateful to share or dish them up to friends and family right out of the pan as you cook them.

Seriously delicious Mashed Potato Pancakes

I served mine with an Orange Cranberry sauce that my Auntie G makes. It's super easy to make and if you're lucky you'll see the recipe on the bag too! One bag fresh cranberries, one whole orange cut into chunks (skin too, but I trim the ends off as I'm chunking it). Put everything into a food processor and process until chunky and well mixed together. I add a 1/2 cup of sugar. You can adjust the sugar as you wish. I used less than the recipe called for. Chill until ready to serve. I'm on my second batch in as many weeks. It's tasty!

27 December 2010

Banana Muffins

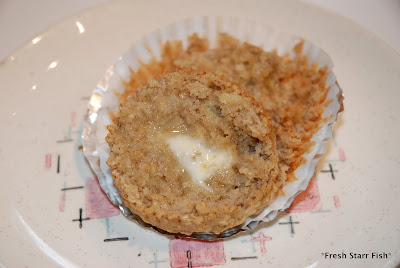
Oh, hello, muffin! I whipped up these Banana Muffins out of the Moosewood Restaurant Low-Fat Favorites cookbook (one of my favorites!) over the weekend. I usually make banana chocolate chip bread when I have some bananas about to turn over to the dark side. I wanted to try something new though and so here we are.


Banana Muffins

1 cup flour
1/4 cup packed brown sugar
1/2 tsp baking soda
1 tsp baking powder
1/2 tsp cinnamon
1/4 tsp nutmeg
1 cup oats
1 egg white
1 egg
2 Tbsp vegetable oil
1 cup mashed ripe banana (I used 2 1/2 smaller bananas)
1/2 cup plain nonfat (or lowfat) yogurt
(optional) 1/2 cup chocolate chips or raisins

Get all your ingredients in line. Preheat oven to 400. Line a 12-muffin muffin pan with liners, cooking spray or light coating of oil. I prefer using muffin liners.

In a large bowl, sift together the flour, brown sugar, baking soda, baking powder, cinnamon and nutmeg. Run the cup of oats through a food processor or blender until you have something the consistency of cornmeal. Add the oats to the dry ingredients.

Flour, baking soda, baking powder, brown sugar, cinnamon & nutmeg.

Oats after a good spin through the food processor.


In another bowl, beat the egg white for three minutes until foamy and increased in volume, but not stiff. Stir the foamy egg white and the additional full egg, oil, mashed banana and yogurt and chocolate chips or raisins if you're using them. Fold the wet ingredients into the dry mixture until just combined.

One whipped egg white, plus one egg.


Spoon the batter into the muffin tin. I added a handful of chocolate chips to six of my muffins at this point just to see how they'd turn out. Bake for 20-25 minutes, until a toothpick inserted into the center of a muffin comes out clean. Remove from oven and cool. Enjoy.


Mmm...wholesome and delish!

05 December 2010

Oh, Sweet Potato

Isn't it fantastic that sweet potatoes are so good for you and are so versatile? I love making sweet potato fries, but tonight I whipped up some mashed sweet potatoes with a bit of Earth Balance vegan "butter", cinnamon, cloves and a sprinkle of brown sugar. It was like dessert, but I was eating veggies! Absolutely fantastic!

29 November 2010

Vegetable Tortellini Soup

The last few weeks I've been determined to make one dish before starting the work week that I can bring to work for lunches. Spinach & Artichoke pasta, anyone? This week I tried out a recipe for Vegetable Ravioli Soup I found a while back on delish.com. I modified it just a touch - cheese tortellini instead of ravioli, which didn't impact the flavor at all. The highlights - it's super easy to make, it's packed with veggies and it's so tasty I know I won't get sick of it eating it for lunch this week!

Vegetable Tortellini Soup

olive oil to coat the bottom of your soup pan
1/2 red bell pepper, chopped
1/2 green pepper, chopped
chopped onion (enough so that you have 2 cups total of chopped onion+red & green pepper)
2 cloves garlic, pressed
sprinkle of crushed red pepper
1 28 oz. can crushed tomatoes
1 can vegetable broth
1 1/2 cups hot water (you could also use another can of vegetable broth)
1 teaspoon dried basil
2 small zucchini, chopped
1 cup (heaping) frozen cheese tortellini


Pour enough olive oil to coat the bottom of your soup pan, turn heat to medium. Add your chopped pepper, onion and garlic mixture. Saute for a few minutes. Add the crushed red pepper if you're using it. I used just a touch, if you like heat, add more! Add your can of tomatoes, broth, hot water and dried basil. Bring to a rolling boil. Add the zucchini. Cook for 3-5 more minutes. Add tortellini and cook as long as the package says. Enjoy!

28 November 2010

Tofurkey - for Real!

If you're a vegetarian with a few Thanksgiving's under your belt, you'll feel me on this one. I've been a vegetarian for over 15 years and luckily much of my family is also meat free - makes family get togethers that involve food (let's face it, almost all of them do!) a breeze. When I was newly meat free and it wasn't as mainstream as it seems to be, the question about Thanksgiving would inevitably come up - "...but, what do you eat on Thanksgiving?" Like those of us who aren't eating turkey are going hungry on Thanksgiving while the rest of the country gorges on everything from sweet potatoes, stuffing, green bean casserole, cranberries and pumpkin pie. Dude we can eat all that and there are some pretty good Turkey stand-ins to boot!

This year my cousins had been talking about the real Tofurkey and how the texture creeped out my cousin B. Cousin M thought we ought to try our own version of this meat free poultry stunt double. He mentioned it in passing late Wednesday night. I wondered if he had a recipe in mind. He said no, he was just planning on winging it. I'm pro-recipe, so I looked up a few recipes online. We ended up using one from vegweb.com as a guide and then somewhat winging it, since we got a very late start and were working with much less tofu than the recipe called for.

Here's roughly what we did:

3 packages extra firm tofu drained (we actually had one extra firm, one firm and one silken - not ideal from a texture standpoint)
poultry seasoning
garlic
dried minced onion
rosemary
thyme
salt
pepper
2-3 smaller portabello mushrooms chopped

Mix all the tofu in a food processor until smooth. Eyeball your spices and add them all to the tofu along with the chopped portabello mushrooms. We went for more spices, wanting more of a robust flavor rather than just the bland tofu.

Once everything was blended smooth, we spooned the mixture into a sieve lined with a clean kitchen towel (I'd suggest a smooth, thin one, rather than a thick textured one!), covered the top and placed a large rock on the top to help press the liquid out. The recipe we followed said to press for 2-3 hours, or overnight. We maybe managed 3 hours and there was barely any liquid in the bowl below the sieve. The towel was wet though, so I guess we got some liquid out.

Looks like a dip, but it's not! Tofu mixture in towel-lined sieve.

Towel-lined sieve, placed in a bowl with a rock on top.

Next, we shaped it into a log shape in a glass 9x13 pan and put it in the oven at 350. We mixed up the "glaze" in the recipe - basically red wine, balsamic vinegar and some of the same spices we used for the tofu mixture. Had we pressed the tofu mixture longer, the glaze probably would have worked a bit better. Our "log" sort of spread out flat. I believe we baked it for about an hour or an hour and a half. I sort of lost track!

Tofu log, ready for the oven!

The finished product. It's not pretty, but it's a tasty meat-free alternative to turkey.

My cousin and I did a ceremonial first bite at the dinner table - both a little scared it wasn't going to be any good. It didn't look pretty, but it tasted good! I was surprised and relieved. We'll have to get an earlier start next year and use all extra firm tofu rather than the mixture we used. It was so much fun though and I can't wait to try making this again!


08 November 2010

Butternut Squash Apple Soup

This weekend was chock full of fall smells in my kitchen! I started with the bread, but a Starr Fish cannot live on bread alone. I have this habit of starring recipes in my google reader and then never thinking about them again or never actually considering the possibility of giving them a try.

Dinner A Love Story featured a quick recipe for "Butternut Squash Soup with Apples." Sounds delish, right? Perfect for a cozy fall weekend! It sounded almost too easy to make and the her pictures made me want to reach my spoon through the screen to steal a taste. I had to give it a try.

Butternut Squash Soup with Apples
1 small/medium onion (I used half of a larger one) chopped
olive oil
pinch of thyme
1 tsp curry powder
pinch of cayenne (optional, I included it and it was tasty!)
salt & pepper
1 butternut squash, halved, seeded peeled, chopped into cubes
2 apples, peeled, chopped into chunks
1 carton of vegetable broth
cider

I had most of the ingredients already, just grabbed a butternut squash and some extra apples beyond those I'd want for snacking this week when I was at the grocery store. While I was waiting for my second loaf of bread rise, I prepped my butternut squash and apples and set them aside. Then chopped up the onion.

Hello, butternut squash!

Apples and butternut squash chunks, prepped and ready to go.

In a soup or stock pot over medium heat, drizzle about a tablespoon of olive oil in the bottom of the pan, add the chopped onions. Stir occasionally until translucent. Add salt (I eyeballed a small mound in my hand, about a teaspoon) & pepper, a pinch of thyme, 1 teaspoon of curry powder, and your pinch of cayenne, if you want a bit of heat like me. Stir around for a couple minutes to bring out the soul of the spices.

Add your prepped butternut squash and apples. Pour in vegetable broth and a good pour of cider. I added probably a half cup. Your squash and apples should be pretty well covered. Turn the heat up and bring to a boil. Then reduce the heat and simmer for 30 minutes.

If you have an immersion blender, I'm totally jealous of you and you can use it to puree the soup right in the pot. If you're like me and have a regular blender, you'll want to puree the soup in batches to get a nice smooth consistency.

Before the blend = chunky.

During the blend, getting smooth!

I served this soup with a little taste of sour cream, but use your imagination and garnish as you wish. DALS suggested walnuts, chives and creme fraiche Sour cream did the trick at Chez Starr Fish!